
Team members
The Team page manages the developer accounts that can collaborate inside the active workspace. Each member uses their own Launcher Forge account and security settings. Workspace resources are not shared through a common login.The Team page represents membership in the active workspace. Games, launcher configuration, builds, players, subscription, add-ons, and usage remain scoped to that workspace.
Roles
Launcher Forge provides three workspace roles.Owner
The Owner can:- Rename the team or workspace.
- Invite and remove members.
- Change member roles.
- Manage games, launchers, branches, builds, players, and workspace settings.
- Manage subscriptions.
- Purchase, renew, or manage add-ons.
- Review plans, limits, and usage.
Admin
An Admin can perform operational management across the workspace, including:- Manage games and their configuration.
- Manage launcher configuration.
- Create and manage branches.
- Publish and review builds.
- Manage players and access.
- Invite members and update operational roles when the interface permits.
- Review plan limits and usage.
- Change or cancel the workspace subscription.
- Purchase, renew, or manage add-ons.
Viewer
A Viewer has read-only access. A Viewer can review:- Team information.
- Games.
- Builds and versions.
- Branches.
- Player status.
- Plan and usage information available to the workspace.
Permission summary
1. Open Team
Select Team from the left sidebar. The page shows:- Team or workspace name.
- Number of active members.
- Number of pending invitations.
- Current members.
- Role assigned to each member.
- Invitation form.
- Pending invitations.
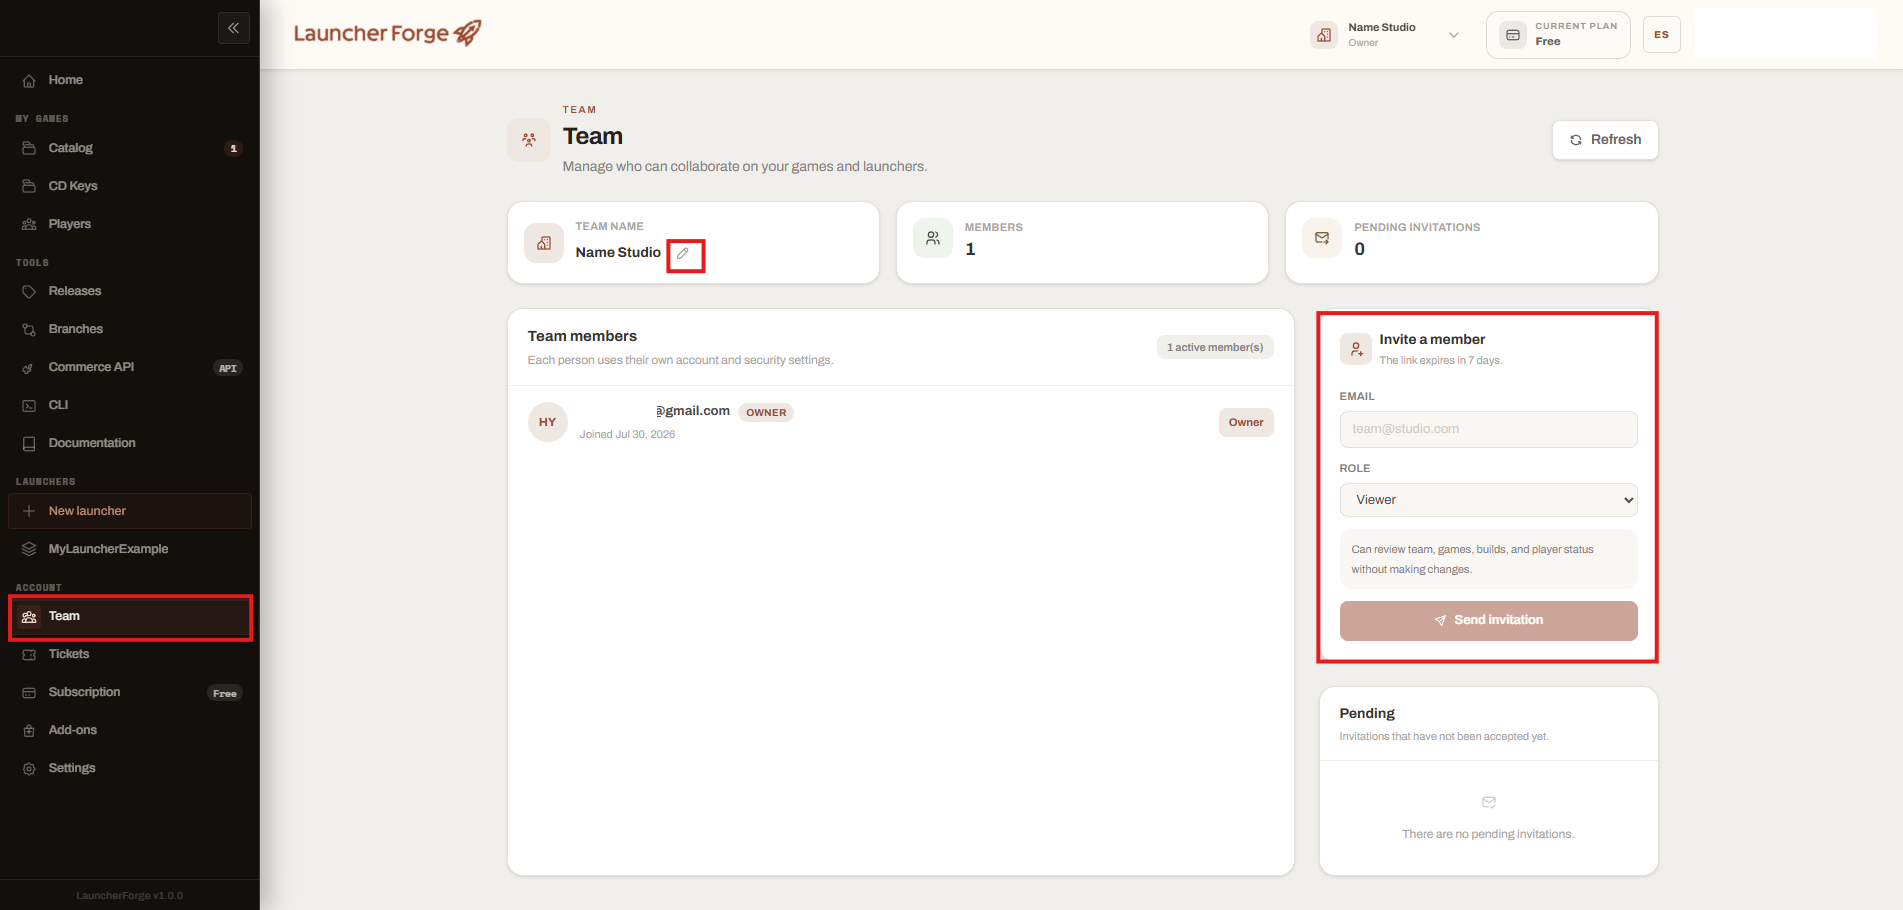
Review members and invite a collaborator
2. Rename the team
Select the pencil icon next to the team name. Enter the new name and save it. The team name identifies the workspace throughout the dashboard and workspace selector.Renaming the team does not rename the games or launcher. Those resources keep their own names.
3. Invite a member
In Invite a member:- Enter the collaborator’s email address.
- Select Admin or Viewer.
- Select Send invitation.
4. Accept the invitation
The recipient receives an invitation by email. They must:- Open the invitation link.
- Sign in to Launcher Forge or create a developer account when required.
- Accept the workspace invitation.
- The account appears under active members.
- The assigned role becomes active.
- The workspace becomes available in the account’s workspace selector.
5. Change a member role
Use the role selector beside an active member. Available collaboration roles are:- Admin
- Viewer
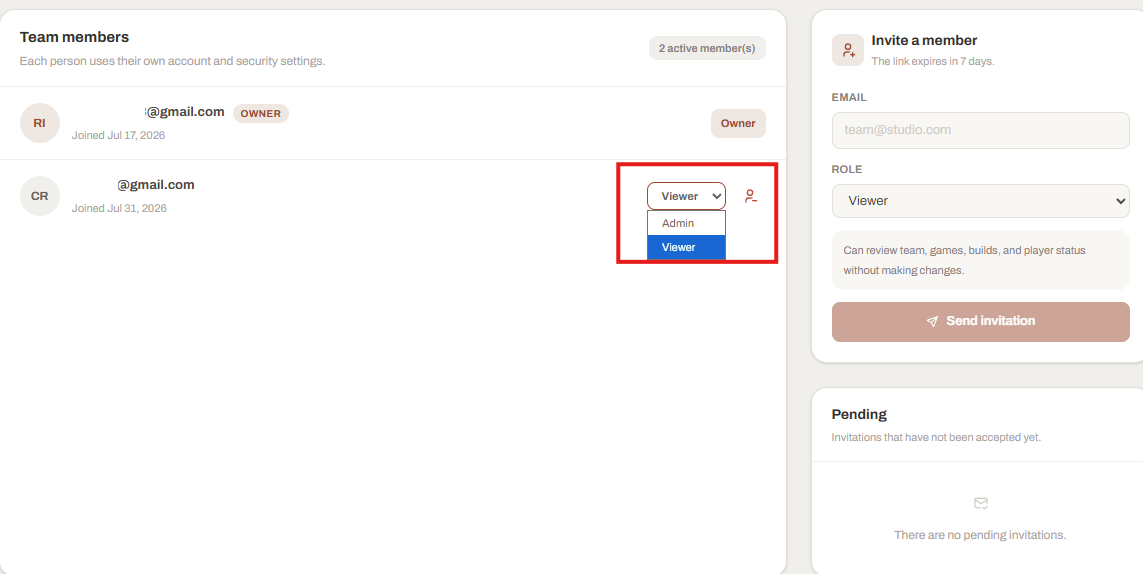
Change an active member between Admin and Viewer
- The member’s account credentials.
- Their role in another workspace.
- Their access to unrelated workspaces.
6. Remove a member
Use the remove-member action beside the account. Removing a member:- Removes access to the current workspace.
- Does not delete the person’s Launcher Forge account.
- Does not delete workspace resources created while they were a member.
- Does not remove access they may have in another workspace.
7. Switch workspaces
An account can belong to more than one workspace by owning one or accepting invitations from other teams. Open the workspace selector in the top navigation bar.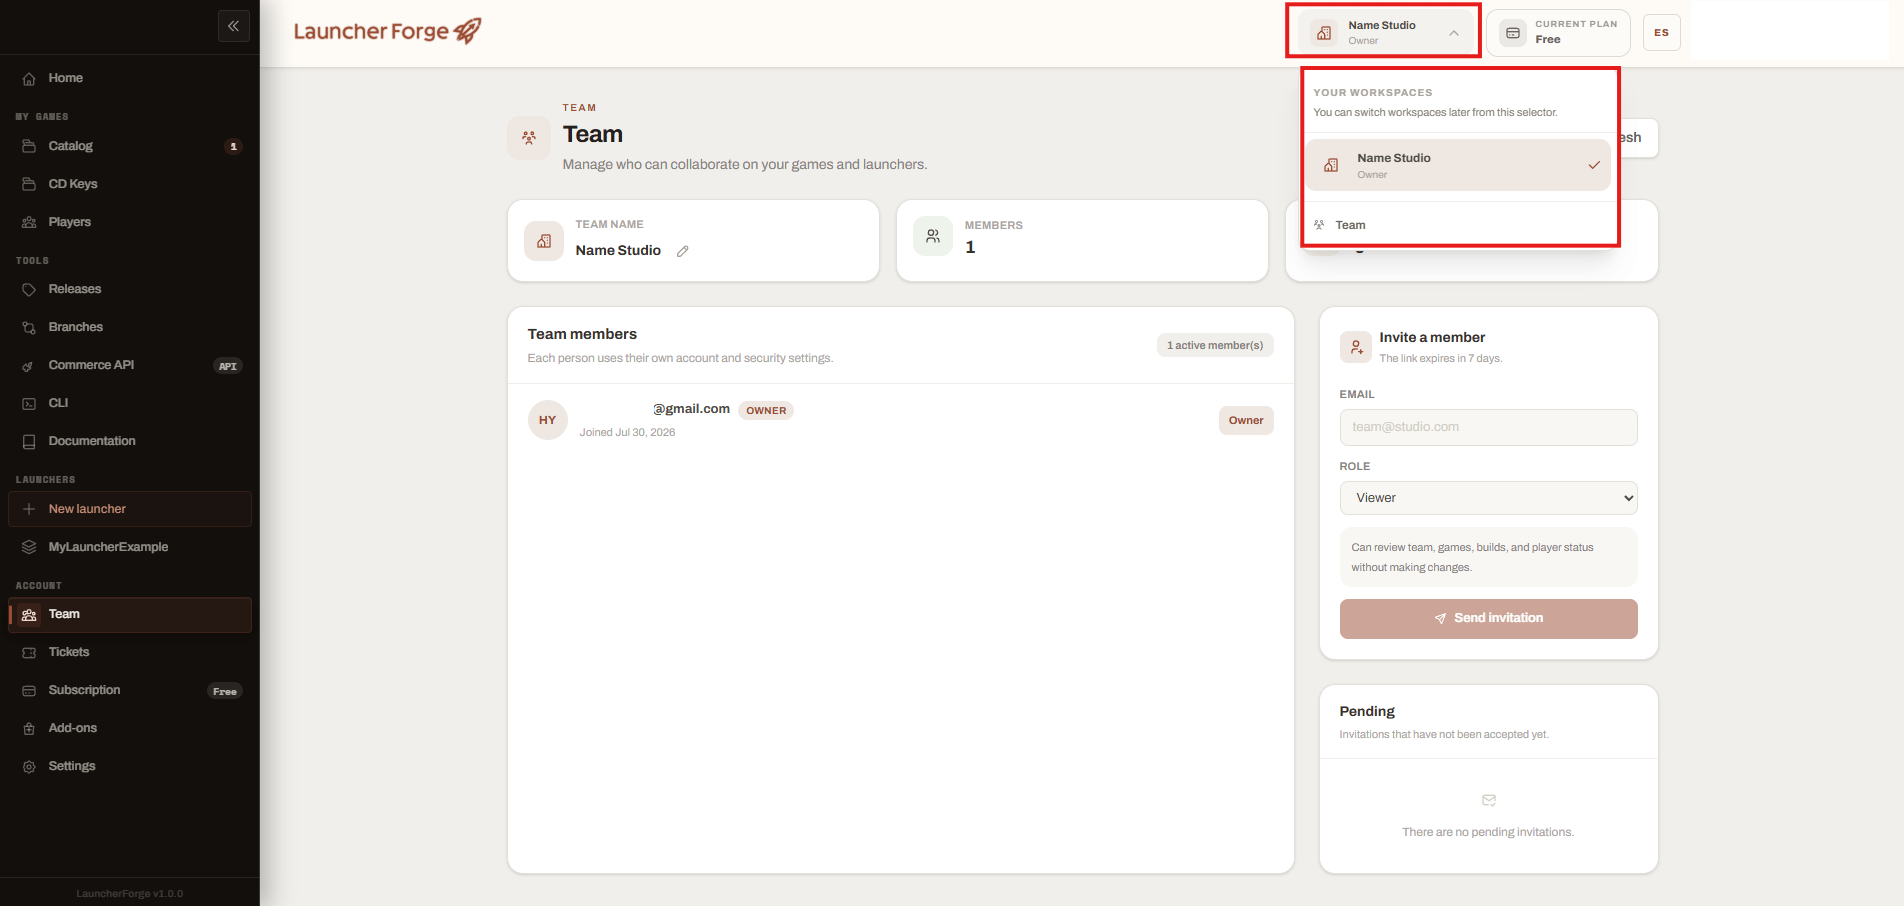
Switch between the workspaces available to your account
- Games.
- Launcher.
- Branches and builds.
- Players.
- Team members.
- Plan and subscription.
- Add-ons.
- Usage.
Team-member limits
The number of members allowed in a workspace depends on the active plan. When the member limit is reached, the workspace may need to:- Remove an unused member.
- Upgrade the plan.
- Use an applicable workspace override or entitlement.
Security recommendations
- Give Admin only to trusted collaborators.
- Use Viewer for reviewers, stakeholders, or read-only access.
- Remove members who no longer work on the project.
- Do not share one developer account between multiple people.
- Review pending invitations regularly.
- Verify the email address before sending an invitation.
Team access is configured correctly when every collaborator uses an individual account and has only the permissions required for their role.
Related guides
Plans and limits
Review the resource and feature limits applied to the workspace.
Subscription
Understand Owner-only plan and billing management.
Usage
Review storage, bandwidth, games, members, and other workspace usage.