
Builds
A build is a packaged version of a game published to a specific branch. Launcher Forge stores the build manifest, file hashes, release metadata, main executable, and uploaded artifacts required by the launcher to install or update the game.Builds are published through the Launcher Forge interactive CLI. The dashboard is used to review branches, versions, changelogs, storage, and comparisons.
Build publishing model
Release types
- STABLE
- PATCH
- HOTFIX
A complete release baseline.Launcher Forge uploads the complete packaged build, including files that may already exist in previous versions.Use
STABLE for:- The first published version.
- A new complete release baseline.
- Major packaging changes.
- Rebuilding the full branch state.
Release type comparison
Before publishing
Confirm that:- The game exists in the Catalog.
- The game entry is published.
- Launcher-game validation is configured.
- The destination branch exists.
- The packaged build runs correctly.
- The folder contains the complete runtime output.
- The correct executable is included.
- The version number has not already been used in the destination branch.
- The workspace has enough storage available.
Publish through the interactive CLI
Review the complete CLI workflow before uploading your first version.
1. Select the release type
During the interactive CLI flow, enter the version number and selectSTABLE, PATCH, or HOTFIX.
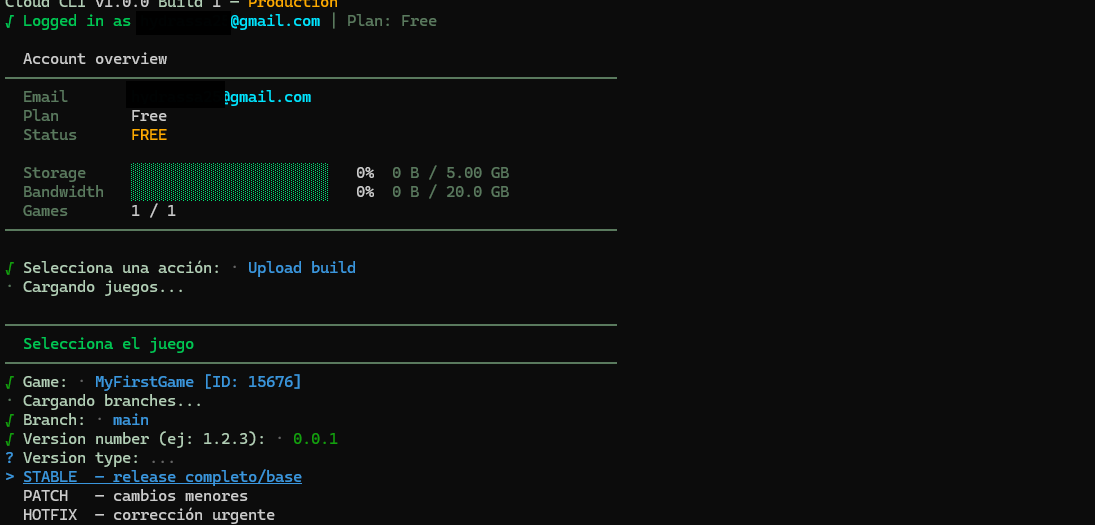
Select the version number and release type
2. Add the changelog
The CLI requests optional release notes. The changelog should explain the visible changes included in the version. Example:- Specific.
- Easy to scan.
- Written for players or testers.
- Consistent with the files included in the build.
3. Select the packaged build folder
Choose the root folder containing the compiled game. Example:4. Manifest and file hashes
Launcher Forge scans the packaged folder and generates a manifest. The manifest records:- Relative file path.
- File size.
- SHA-256 content hash.
- Total file count.
- Unique hash count.
- Executables detected in the package.
5. Select the main executable
After generating the manifest, the CLI lists the executables detected inside the build. Launcher Forge may mark one executable as Recommended. Select the executable that starts the actual game.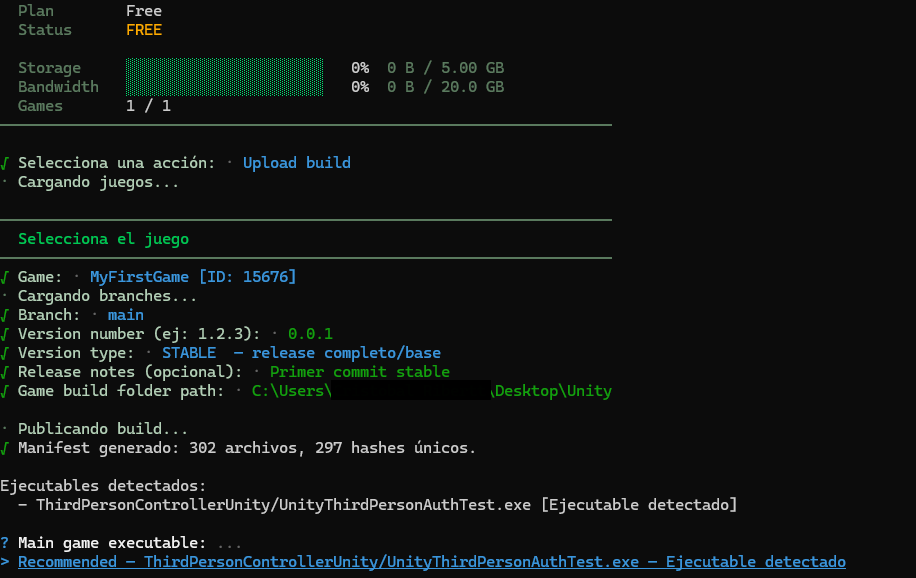
Review the manifest and select the main executable
6. Upload the build
After confirmation, Launcher Forge uploads the required artifacts. For aSTABLE release, the CLI indicates that the complete set of files will be uploaded.
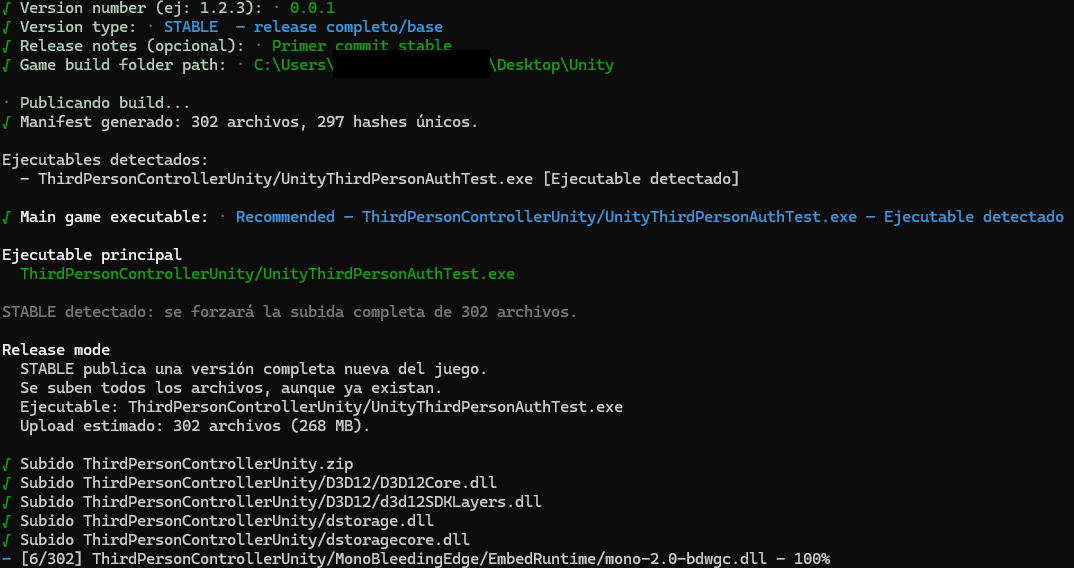
Upload the packaged game files
7. Confirm publication
When the upload succeeds, the CLI confirms:- Version number.
- Release type.
- Destination branch.
- Main executable.
- Successful build creation.
- Successful artifact upload.
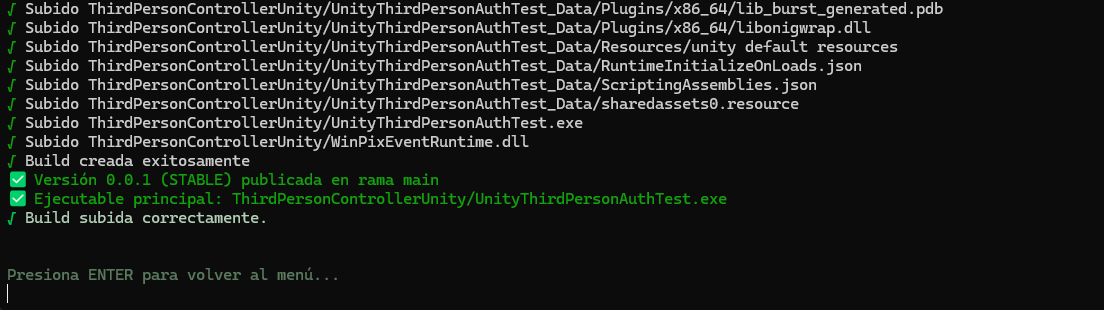
Confirm the successfully published build
Review builds in the dashboard
Open Branches and select the game. The branch overview displays:- Number of branches.
- Total builds.
- Storage usage.
- Latest version.
- Build history for each branch.
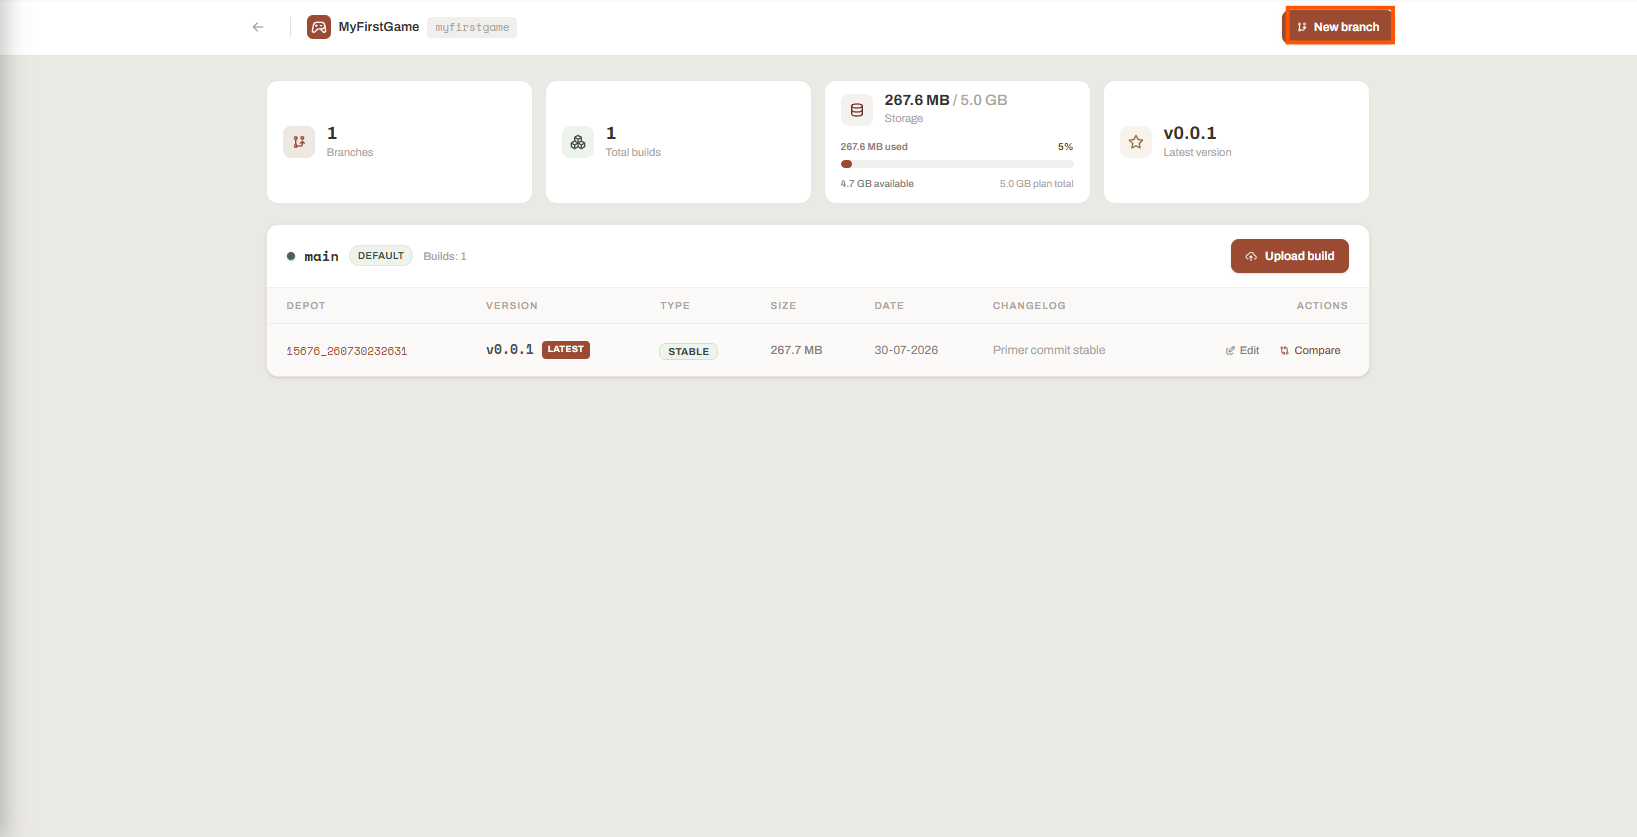
Review build and storage information by branch
Version history
Each branch displays its published versions.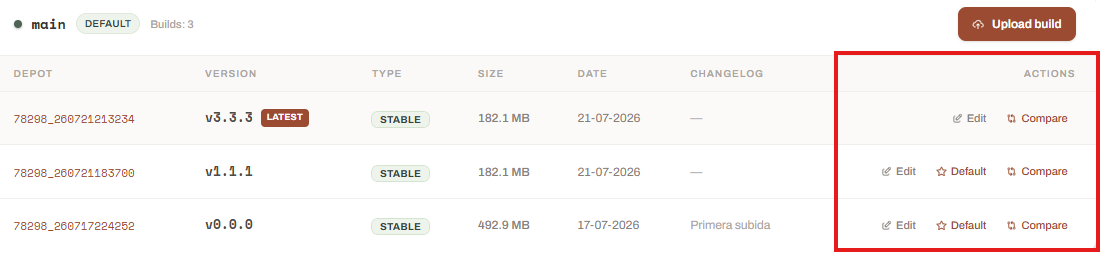
Review the version history and available build actions
The newest version is marked with LATEST.
Eligible versions can also expose a Default action in the current interface.
Edit a build
The Edit action updates only the changelog or release notes. It does not replace:- Uploaded files.
- Manifest.
- Hashes.
- Version number.
- Release type.
- Branch.
- Main executable.
Compare versions
Select Compare from a version row. Choose an earlier version as the base build and compare it with the selected current build. Launcher Forge compares the stored manifests and groups files into: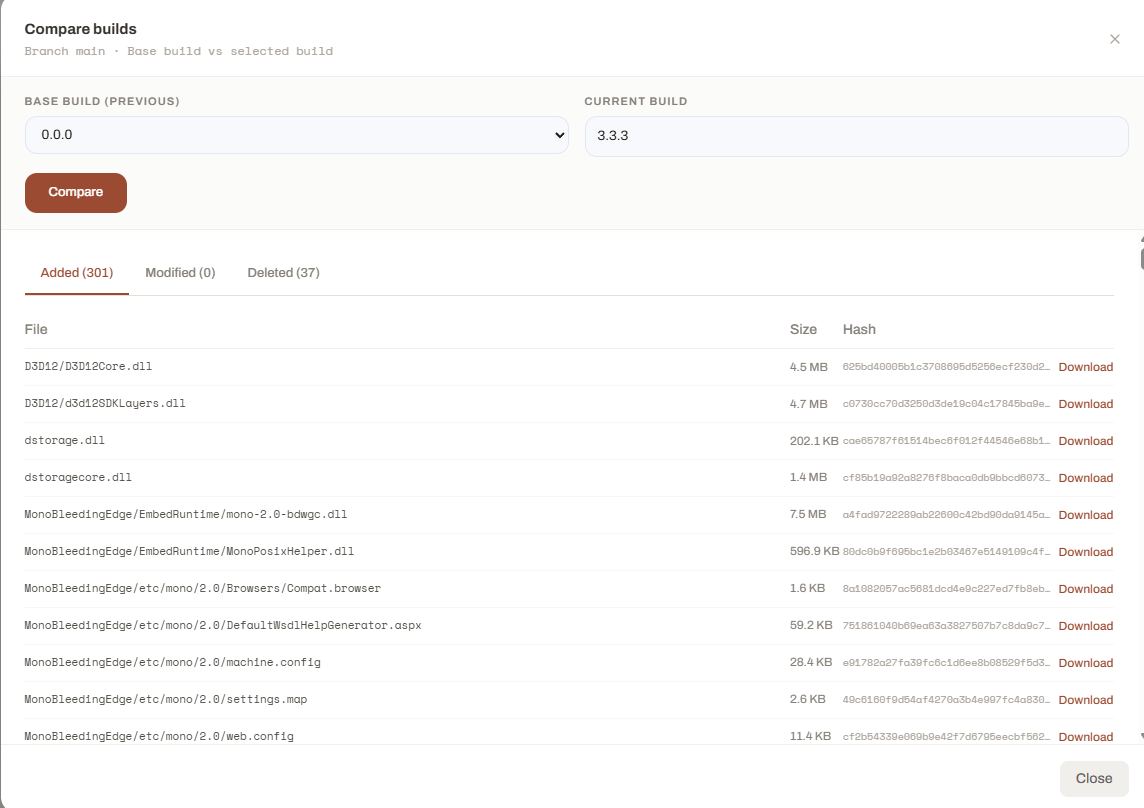
Review file-level differences between versions
- Relative file path.
- File size.
- SHA-256 hash.
- Download action, when available.
Build comparison example
Version history and launcher updates
When a newer version is published to the branch used by the player:- The launcher checks the branch version information.
- It detects that a newer version is available.
- It compares the installed state with the published manifest.
- It downloads the required files.
- It removes obsolete files when required by the version transition.
- It updates the installed game.
- It starts the game using the configured main executable.
The exact files transferred depend on the published manifests, hashes, release type, and the version currently installed by the player.
Storage usage
Build artifacts count toward workspace storage. The branch overview shows:- Storage currently used.
- Total plan storage.
- Usage percentage.
- Remaining capacity.
Failed publications
A build can fail before completion because of:- Invalid or expired CLI session.
- Missing game or branch permission.
- Duplicate version number.
- Invalid packaged folder.
- No executable detected.
- Storage limit reached.
- Network interruption.
- Files changed during scanning or upload.
- Unexpected backend response.
Recommended release strategy
Choose the branch based on who should receive the version. Choose the release type based on the purpose and upload behavior of the build.
Verification checklist
Before considering a build ready, verify:- The correct game was selected.
- The correct branch was selected.
- The version number is unique.
- The release type matches the intended update.
- The changelog is accurate.
- The packaged folder contains the complete runtime.
- The main executable is correct.
- The CLI finished successfully.
- The version appears in branch history.
- The build size is reasonable.
- Manifest comparison shows the expected changes.
- The launcher can download, update, and start the game.
A build is ready for distribution when it appears in the intended branch, its manifest is complete, the correct executable is configured, and the launcher can install and start it successfully.
Related guides
Branches
Create public and private release channels and manage player access.
Publish a build
Follow the complete interactive CLI publishing workflow.
Test your launcher
Verify game acquisition, download, installation, updates, and startup.