
Launcher Forge CLI
The Launcher Forge CLI is an interactive Windows application used to publish packaged game builds. It guides you through the complete workflow using menus and prompts. You do not need to construct deployment commands or provide command-line flags.The CLI is a portable executable. It does not require an installation process. You can keep it on your desktop or in another folder and run it directly.
What the CLI does
The CLI allows a developer to:- Authenticate with a Launcher Forge developer account.
- Review workspace usage and plan limits.
- List available games.
- List published versions.
- Publish a build to a selected branch.
- Review the installed CLI version.
- Close the local session with Logout.
Download the CLI
Open the Launcher Forge dashboard and select CLI from the left sidebar. Select the game you want to review and open its CLI publishing page. The page displays:- Application ID.
- Number of branches.
- Default branch.
- CLI access status.
- Windows CLI download.
- A summary of the interactive publishing workflow.
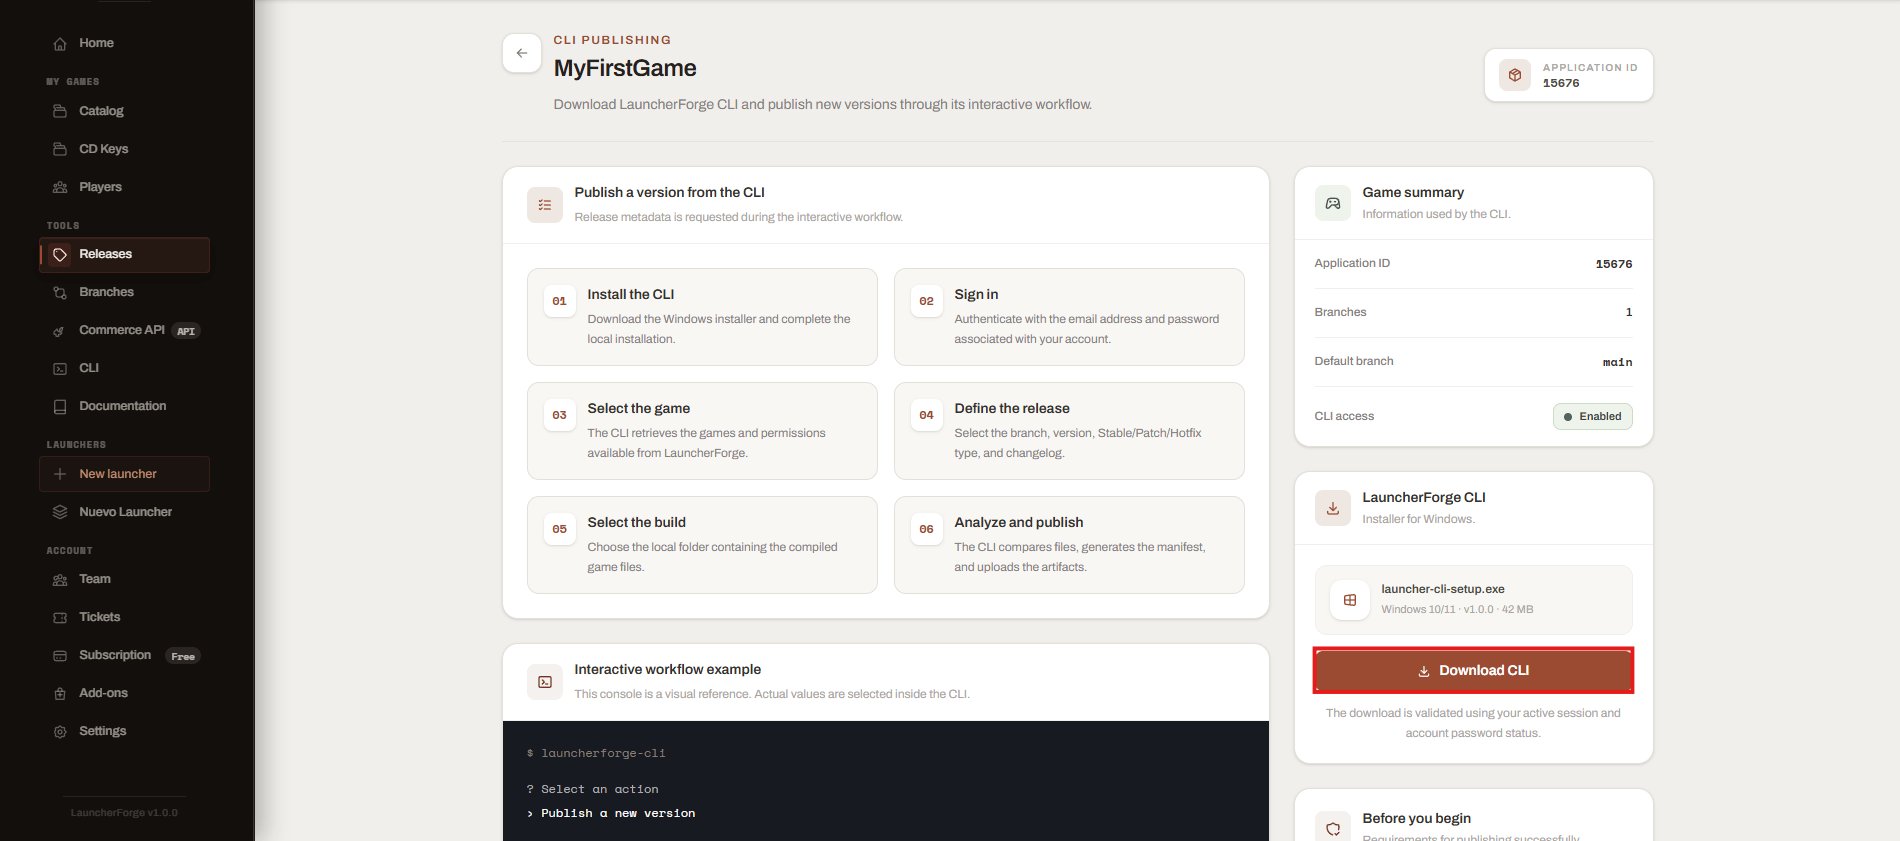
Download the Launcher Forge CLI from the dashboard
Run the CLI
After downloading the executable:- Move it to the desktop or another folder.
- Open the executable directly.
- Keep the terminal window open while using the CLI.
Download a newer executable when Launcher Forge publishes a new CLI version. Use Version info from the menu to review the version currently running.
Authentication
When no valid local session exists, the CLI requests the developer account email and password.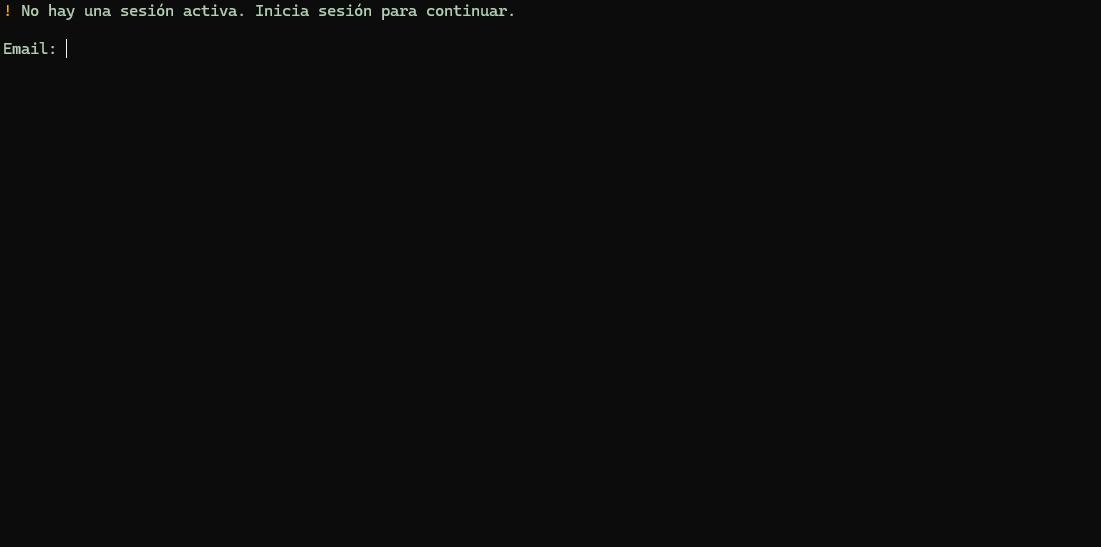
Sign in when no active CLI session exists
Accounts created through OAuth
When the developer account was created through Google, GitHub, or another OAuth provider, the CLI still requires an email and password. Create a password for the account from Launcher Forge before attempting to sign in through the CLI.Account overview
After authentication, the CLI displays an account summary. It can include:- Developer email.
- Current plan.
- Account status.
- Storage used and available.
- Bandwidth used and available.
- Games used and allowed.
Main menu
The CLI presents an interactive menu.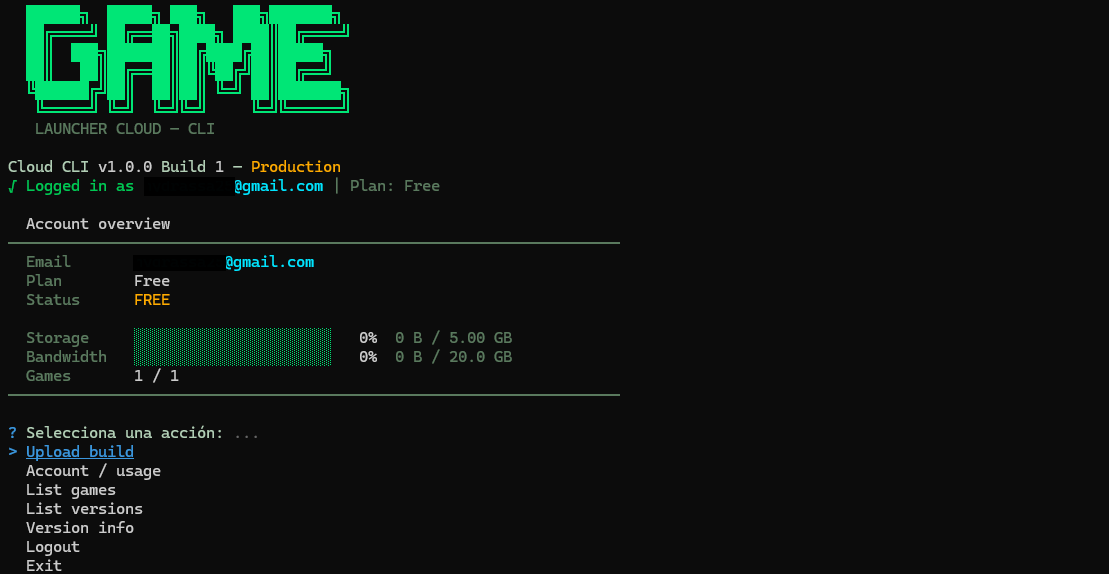
Launcher Forge CLI account overview and main menu
Use the arrow keys to select an option and press Enter.
Publishing builds
Build publishing starts from Upload build. The workflow requests:- Game.
- Branch.
- Version number.
- Release type.
- Changelog.
- Packaged build folder.
- Main executable.
- Final upload confirmation.
Publish your first build
Follow the complete interactive workflow, from authentication to successful upload.
Understand builds
Learn how STABLE, PATCH, HOTFIX, manifests, hashes, executables, and comparisons work.
CLI session
The CLI session is independent from the session currently open in your web browser. Use Logout when:- You want to change developer accounts.
- You used a shared computer.
- The current session is no longer valid.
- The wrong workspace or game permissions are displayed.
What the CLI does not do
The CLI does not:- Create developer accounts.
- Create games in the Catalog.
- Create launcher player accounts.
- Configure launcher templates.
- Configure game keys.
- Generate the launcher installer.
- Edit an existing build’s files.
- Replace a published version.
Recommended workflow
Related guides
CLI troubleshooting
Resolve authentication, permission, folder, executable, storage, and upload errors.
Branches
Create public or private publishing channels before uploading a version.
Test your launcher
Verify download, installation, updates, and game startup after publishing.