
Publish your first build
Launcher Forge publishes game builds through an interactive CLI. You do not need to write a deployment command or remember command-line flags. The CLI guides you through the entire process using menus and prompts.Before you begin
Confirm that:- The game exists in the Catalog.
- The game status is Published.
- The game has at least one branch.
- CLI access is enabled.
- You have a packaged build that runs correctly.
- Your account has permission to publish builds.
- Your workspace has enough storage available.
- You know which executable starts the game.
Accounts created through Google or GitHub may need to create a Launcher Forge password before signing in to the CLI with email and password.
1. Open the CLI section
Sign in to the Launcher Forge dashboard. In the left sidebar, select CLI. Launcher Forge displays the games available for publishing. Select the game card or use Open CLI.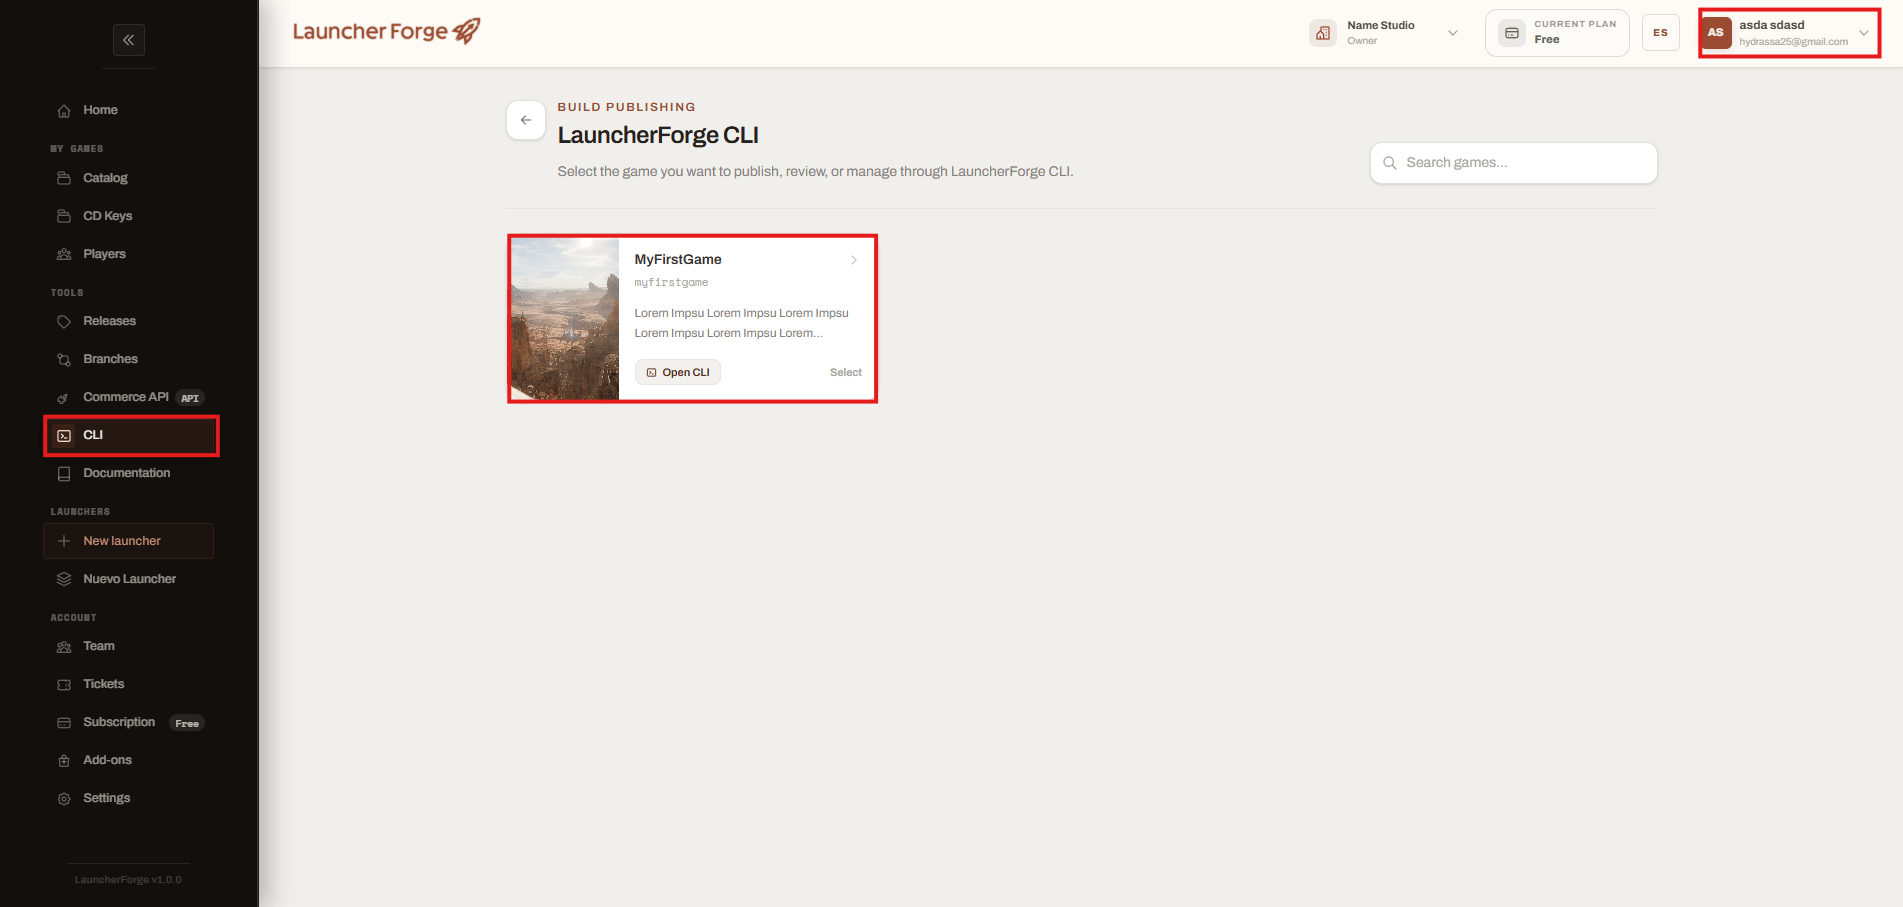
Open the CLI section and select the game
The CLI only retrieves games and permissions available to the authenticated account.
2. Download the CLI executable
The game-specific CLI page shows:- Application ID.
- Number of branches.
- Default branch.
- CLI access status.
- Executable version.
- Download size.
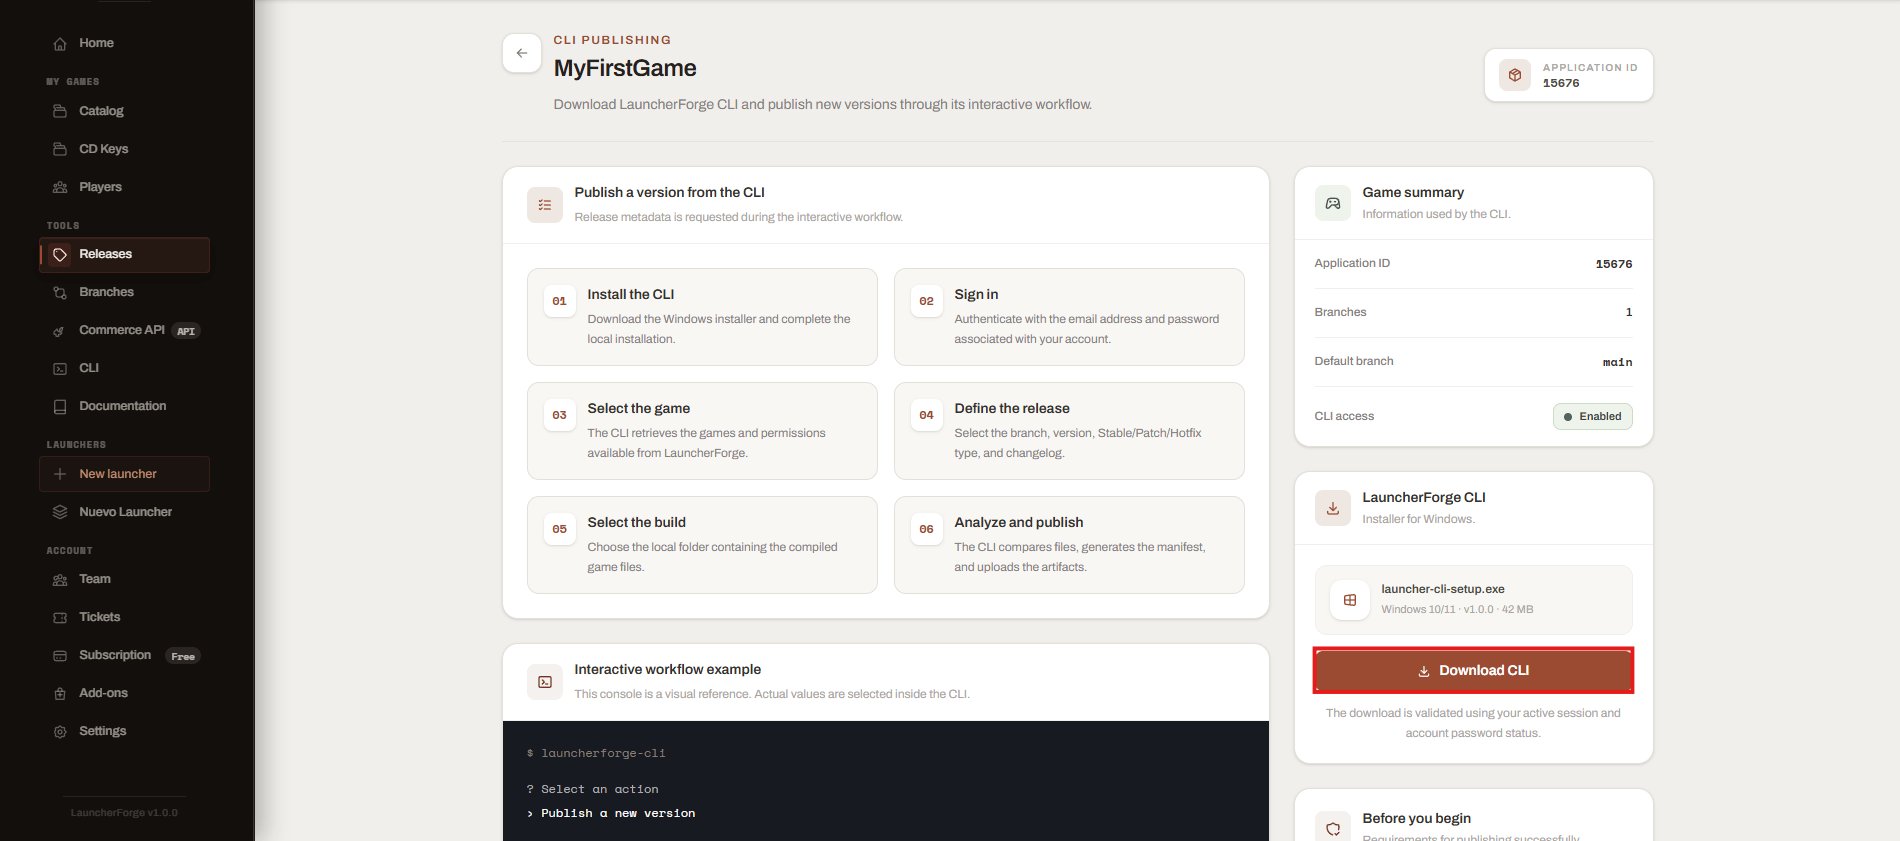
Download the Launcher Forge CLI executable
- Save it on your desktop or another folder.
- Double-click the executable.
- Start using the CLI immediately.
3. Sign in
When no active session exists, the CLI displays: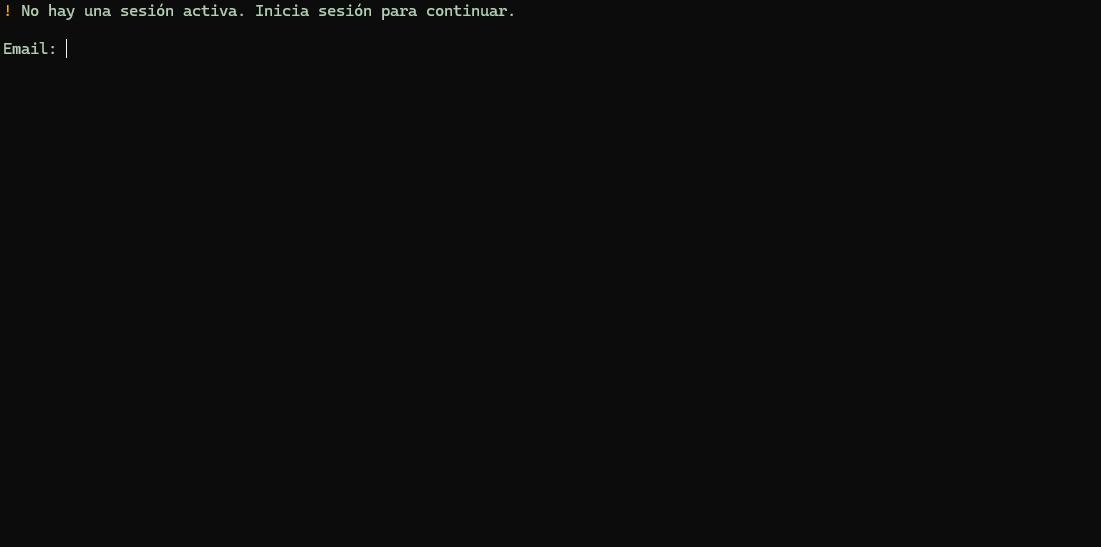
Sign in with your Launcher Forge email and password
Signing in to the dashboard does not automatically sign in to the CLI. The CLI keeps its own local session.
- Account email.
- Active plan.
- Account status.
- Storage usage.
- Bandwidth usage.
- Number of games allowed and currently created.
4. Select Upload build
The main menu contains the available interactive actions. Select Upload build.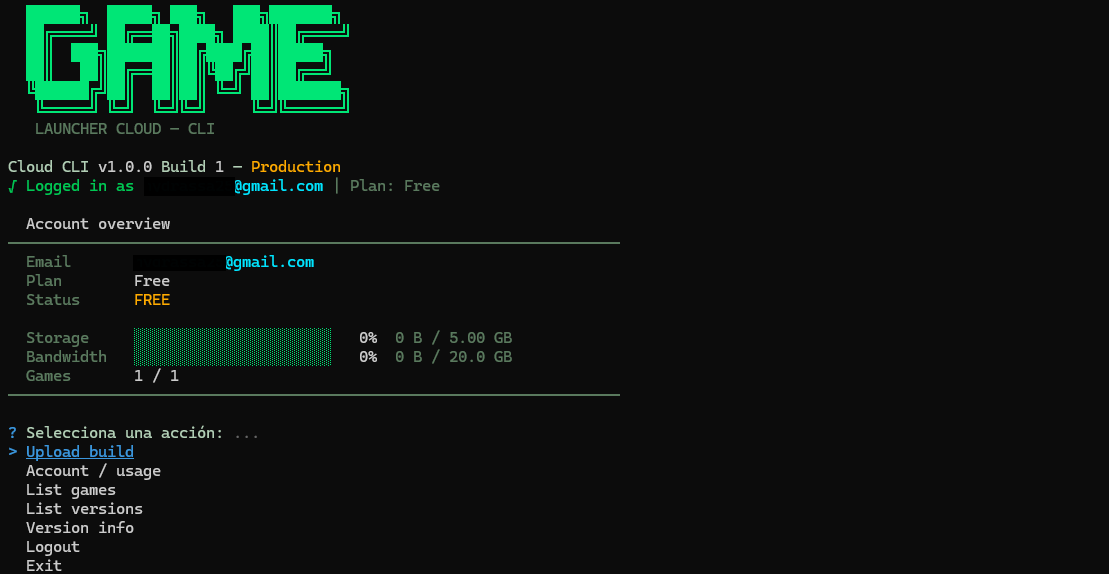
Select Upload build from the interactive menu
- Account / usage.
- List games.
- List versions.
- Version info.
- Logout.
- Exit.
5. Select the game
The CLI loads the games available to your account. Select the game you want to publish. The game is displayed with its Application ID.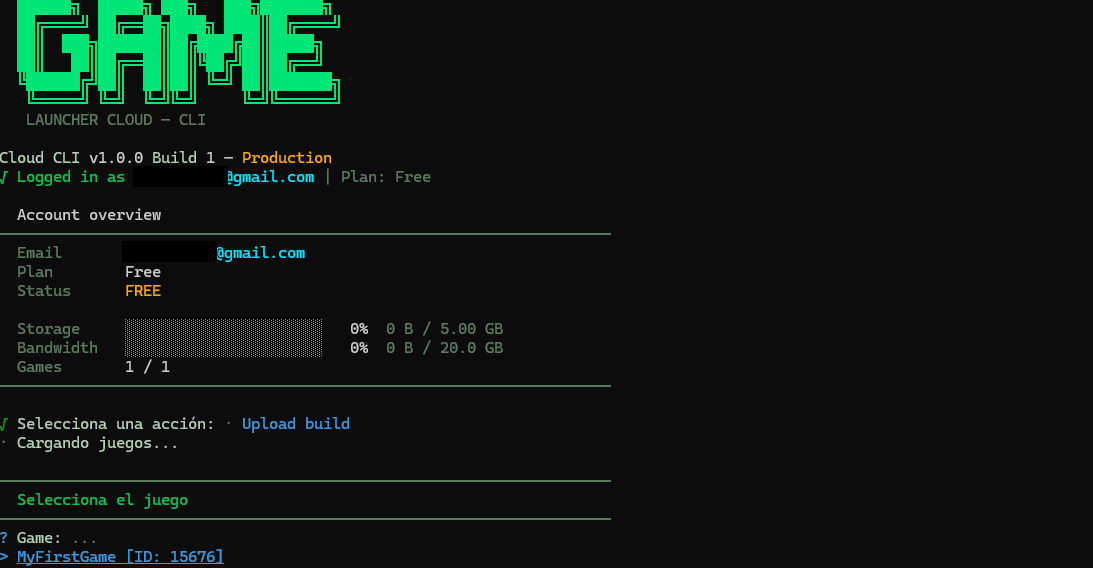
Select the game that will receive the build
6. Select the branch
After selecting the game, the CLI loads its available branches. Select the destination branch.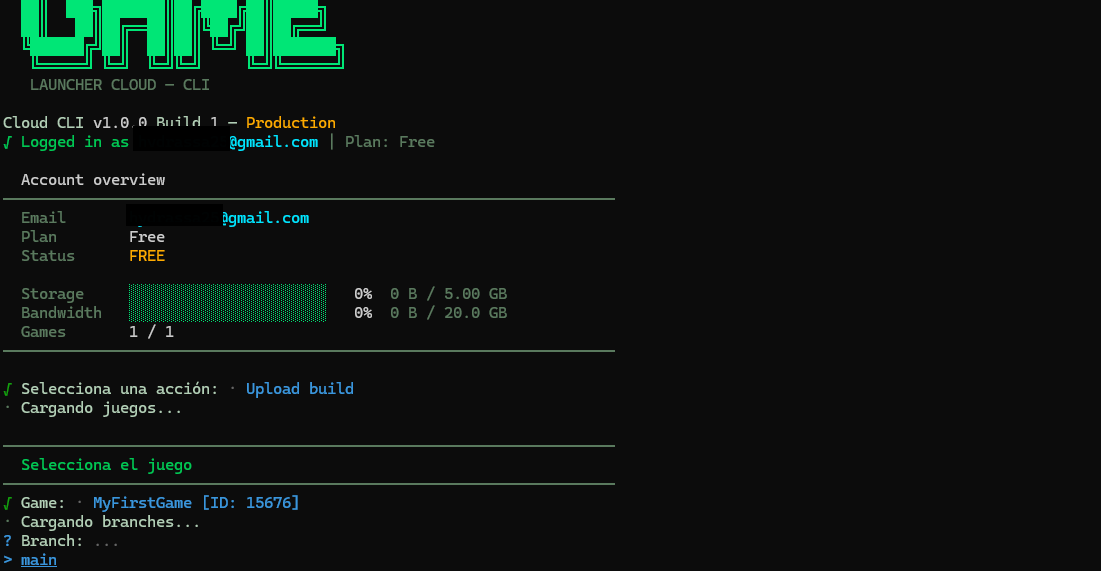
Select the destination branch
mainstablebetadevelopment- An authorized private branch
7. Enter the version and release type
Enter a new version number. A semantic version format is recommended: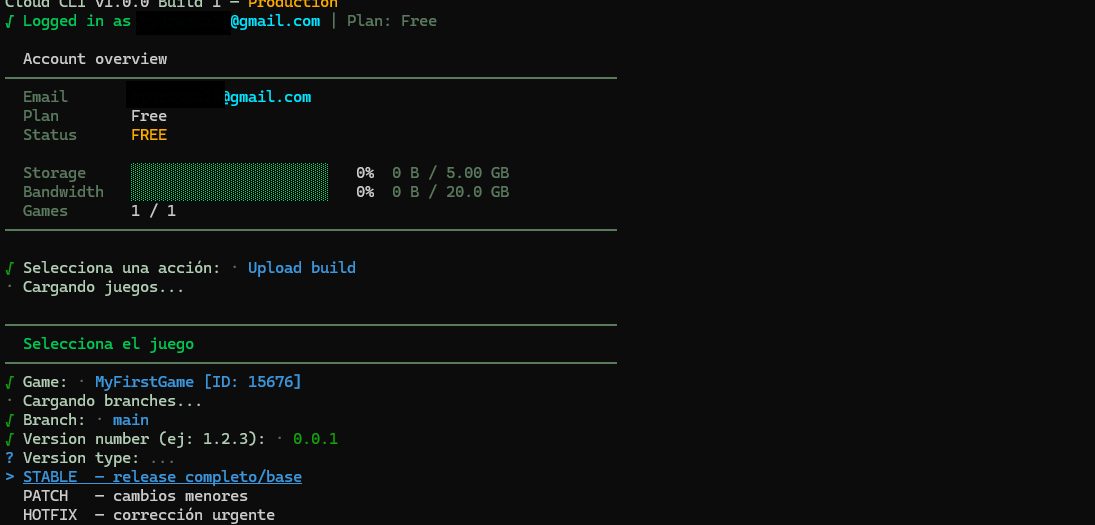
Enter the version and select the release type
- STABLE
- PATCH
- HOTFIX
Publishes a complete new version of the game.All files are uploaded, even when some files already exist.
8. Add release notes and select the build folder
Enter optional release notes or a changelog. Write a short player-facing description. Example: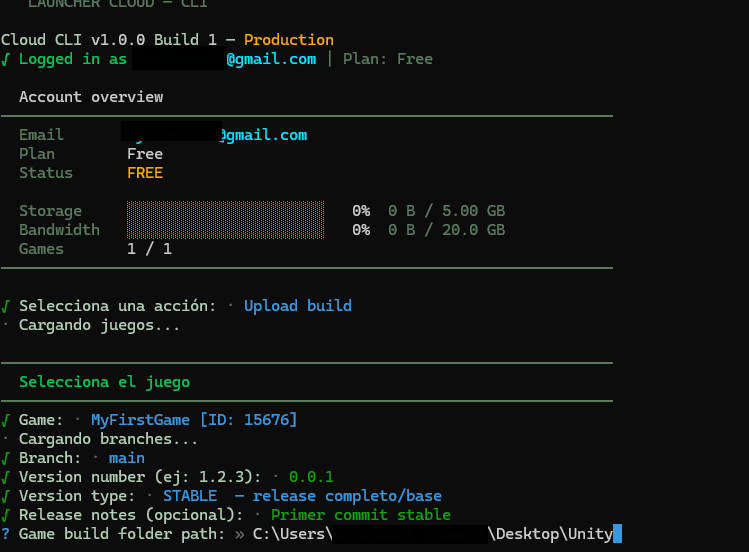
Enter release notes and the packaged game folder path
- The Unreal Engine or Unity project folder.
- Source code.
- Editor cache.
- Intermediate files.
- Temporary build files.
- Folders containing credentials.
9. Confirm the main executable
Launcher Forge scans the selected folder and generates the manifest. The CLI reports:- Number of files.
- Number of unique hashes.
- Detected executables.
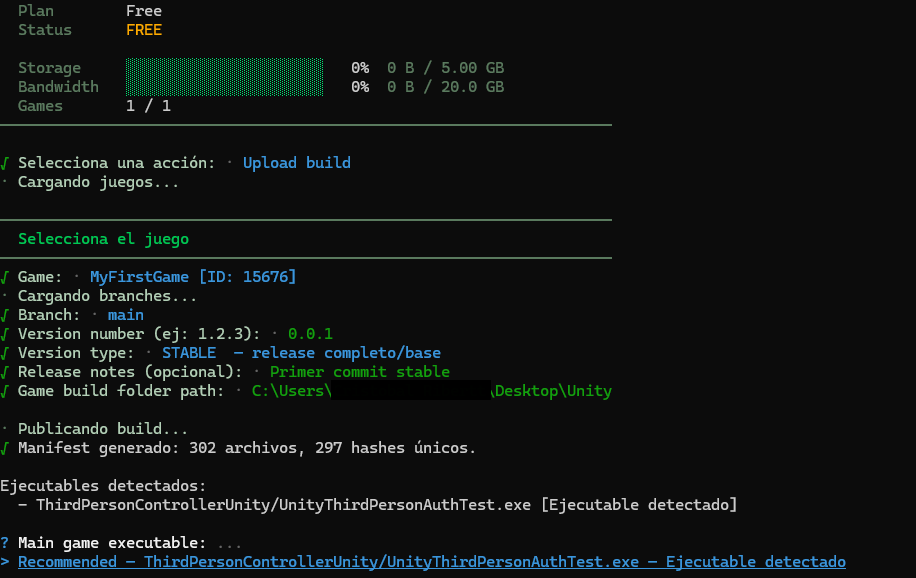
Confirm the main game executable detected by the CLI
10. Wait for the upload
Before transferring files, the CLI displays the release mode and estimated upload. For aSTABLE release, Launcher Forge forces a complete upload of the packaged version.
The CLI then uploads the files and displays the current progress.
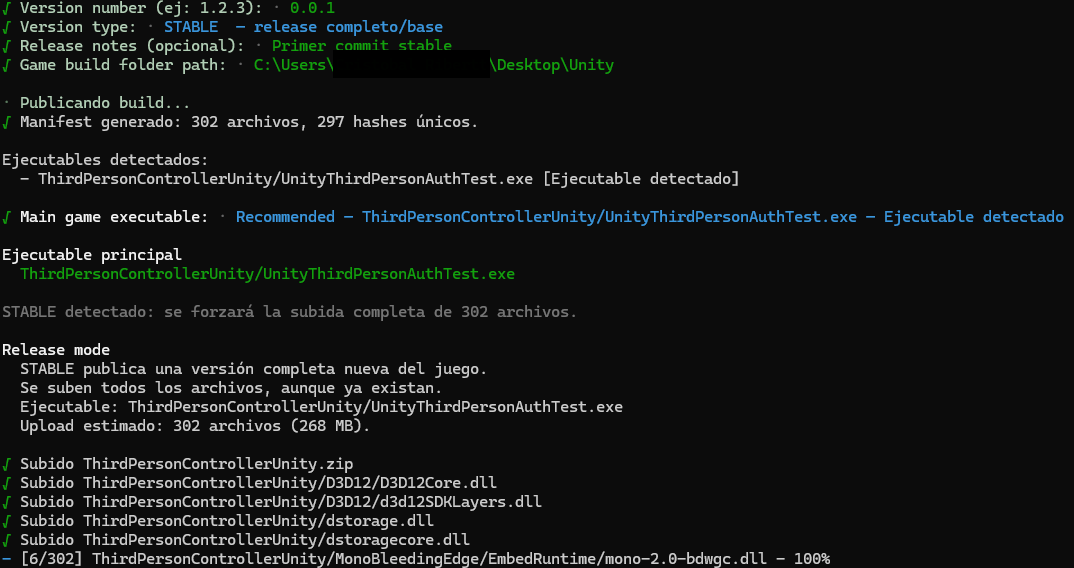
Wait while the game files are uploaded
11. Confirm the successful publication
When the process completes, the CLI confirms:- Build created successfully.
- Version number.
- Release type.
- Destination branch.
- Main executable.
- Successful upload.
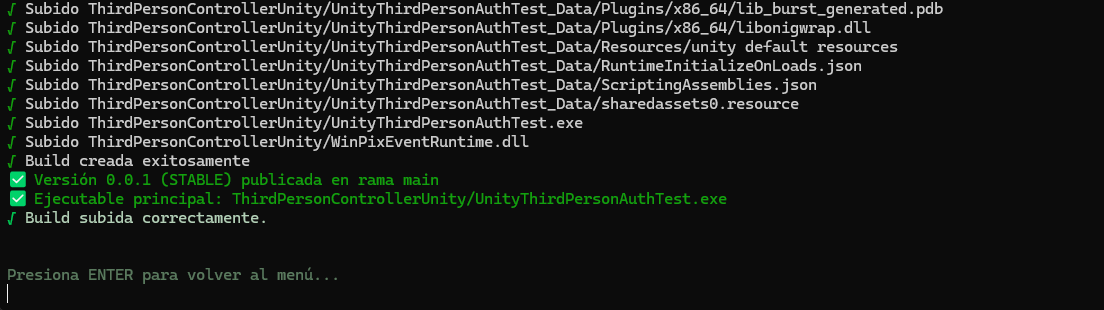
Confirm that the build was published successfully
Your first game build has been published successfully.
What happens after publishing?
After the build is published:- The version appears in Launcher Forge.
- The release belongs to the selected branch.
- The launcher can use the selected main executable.
- Players can download or update the game when the release is available to them.
- Version number.
- Branch.
- Release type.
- Release notes.
- Main executable.
- Build status.
- Installation and game startup from the launcher.
If the upload fails
The CLI displays the cause and should return to a usable menu instead of closing unexpectedly. Common causes include:- Invalid or expired session.
- Missing game or branch permission.
- Duplicate version.
- Invalid packaged folder.
- Storage limit reached.
- Network interruption.
- No executable detected.
- Files changed while the upload was running.