
Test your launcher
After publishing your first game build, complete the launcher setup and test the same flow your players will use. This process covers:- Naming the launcher.
- Linking the game.
- Choosing free or key-based access.
- Generating the launcher executable.
- Installing the launcher.
- Creating an end-user account.
- Acquiring or redeeming the game.
- Downloading and starting the game.
Before you begin
Confirm that:- The launcher exists.
- The launcher has the final name you want to distribute.
- The game is Published in the Catalog.
- The game has a valid published build.
- The main game executable was selected correctly during CLI publishing.
- The game is ready to be linked to the launcher.
1. Set the final launcher name
Open your launcher from the left sidebar. Select the edit icon beside the launcher name, enter the final name, and select Save. The generated Windows installer uses the launcher identity configured on this page.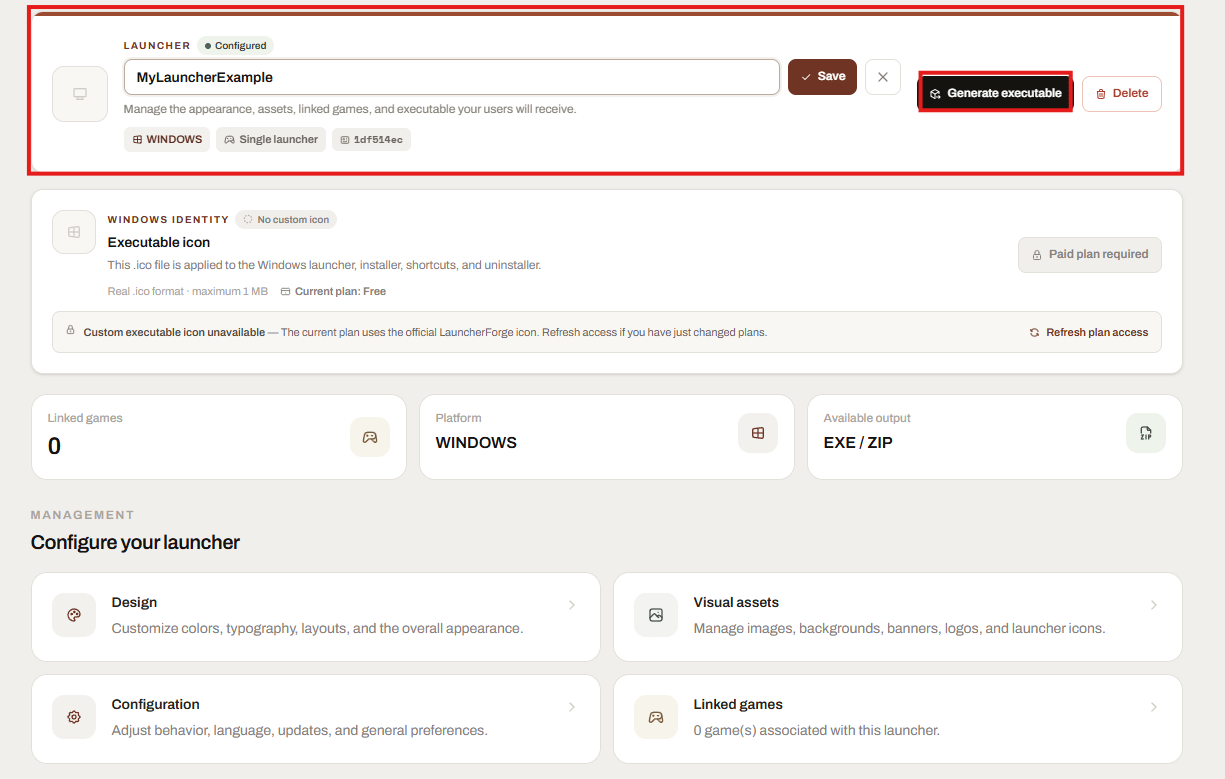
Set the final launcher name before generating the executable
Executable icon behavior
The launcher icon is synchronized automatically through the runtime configuration. This means that changing the configured launcher icon does not require generating a completely new launcher package for the runtime launcher to receive the update. The available icon behavior depends on the active plan:- Plans with custom icon support can use the configured
.icofile. - Plans without custom icon support use the official Launcher Forge icon.
The launcher icon is updated automatically through the runtime configuration.
2. Open Linked games
In the launcher management area, select Linked games.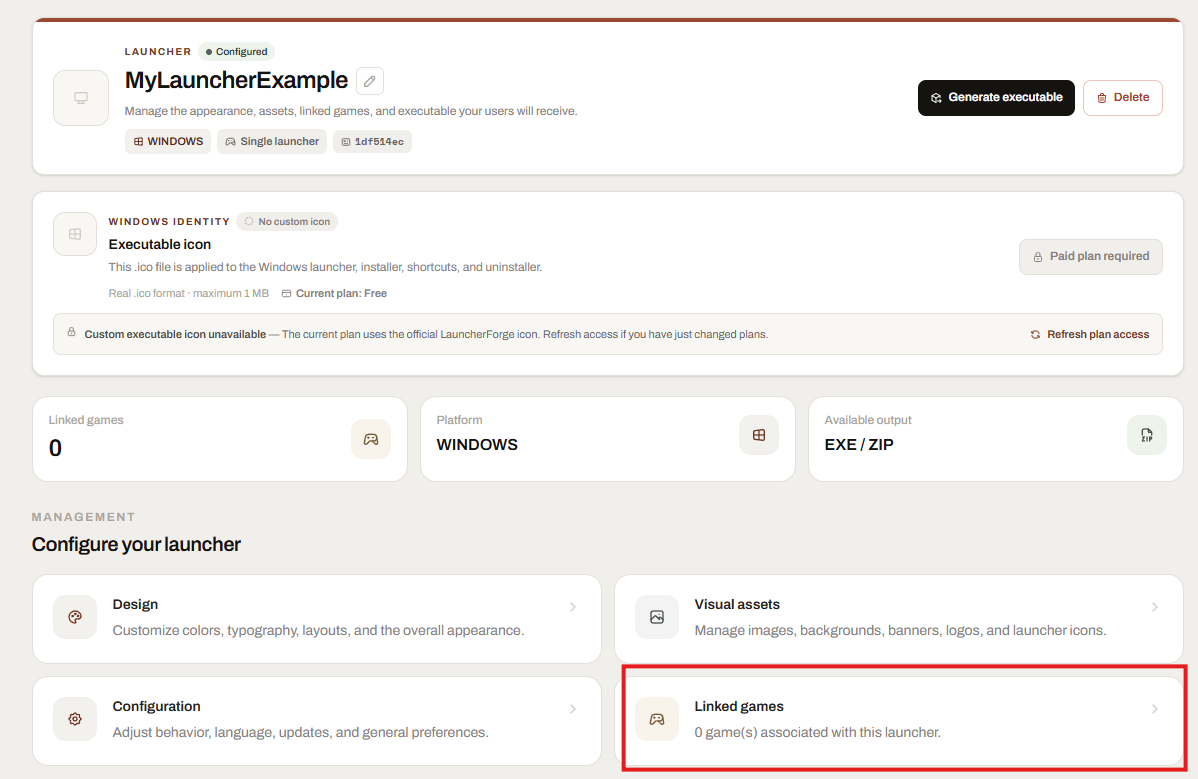
Open the Linked games configuration
- Number of linked games.
- Number of available games.
- Games that can be associated with the launcher.
- Access mode for each game.
3. Choose the game access mode
Before linking the game, decide how players will obtain access.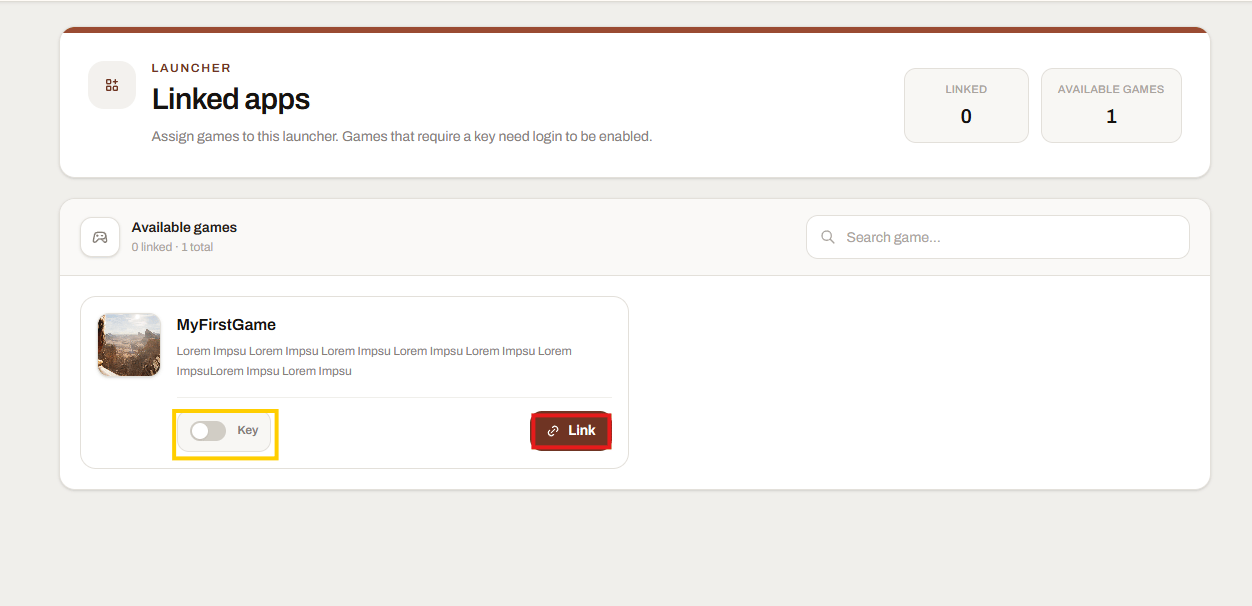
Choose the access mode and link the game
- Free access
- Key-based access
Leave Key disabled.The game is treated as free inside the launcher. After signing in, an end user can select Acquire to add it to their account.Use this mode for:
- Free games.
- Public demos.
- Open tests.
- Games that do not require a purchase key.
All launcher users still authenticate with an end-user account. Key mode adds a redemption requirement; it does not replace end-user authentication.
4. Link the game
Select Link. After the operation finishes:- The linked counter increases.
- The game displays the Linked status.
- The action changes to Unlink.
- The game becomes part of this launcher configuration.
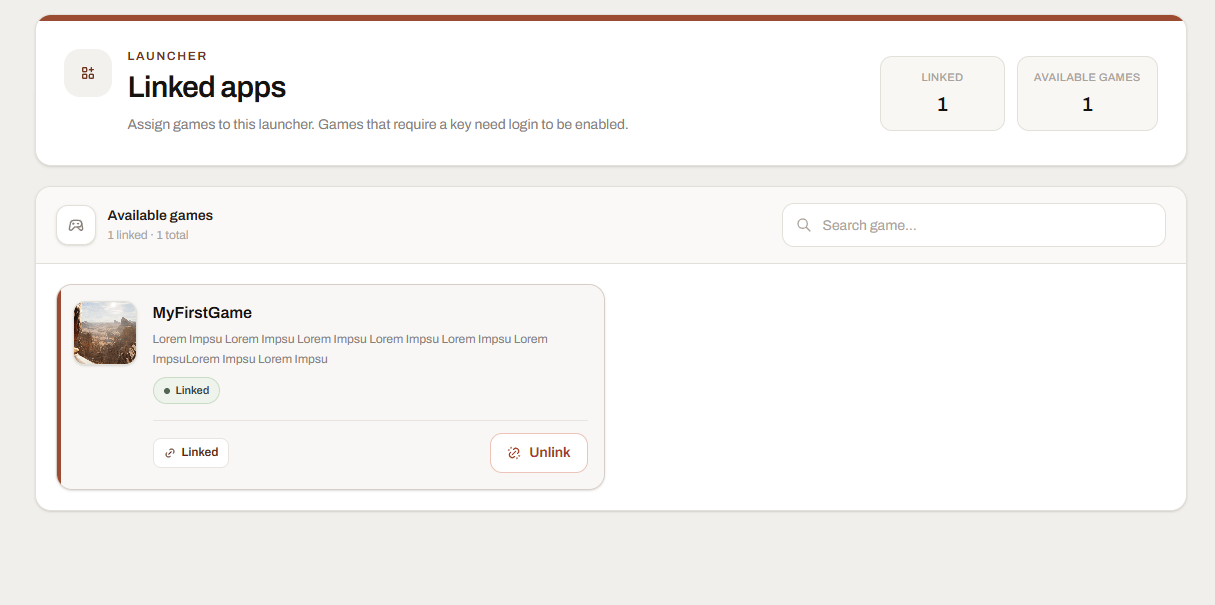
Confirm that the game is linked to the launcher
Can the game be linked after generating the launcher?
Yes. The launcher receives linked-game and content configuration through runtime updates. You can link or unlink a game after generating the installer without generating a new installer only for that change. However, the recommended initial order is:- Rename the launcher.
- Link the game.
- Review the game access mode.
- Generate the launcher.
- Test the complete player flow.
5. Open Generate executable
Return to the launcher overview and select Generate executable. Launcher Forge provides two output types.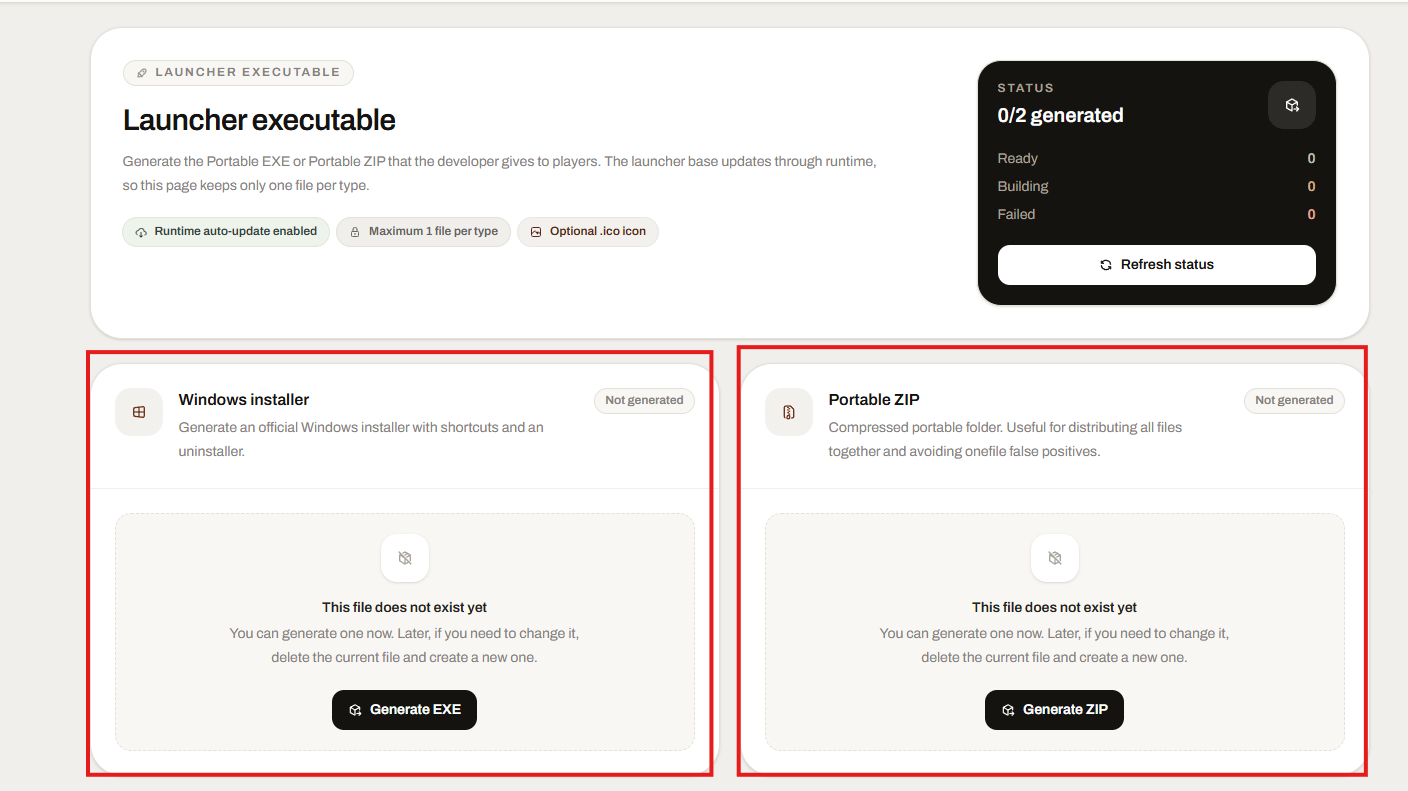
Choose the launcher output type
Windows installer
Generates an official Windows setup executable with installation, shortcuts, and an uninstaller.This is the recommended option for most players.
Portable ZIP
Generates a compressed portable folder.This is useful when you want to distribute the launcher files together without using an installer.
The launcher base and its runtime configuration can update automatically. You do not need to regenerate the launcher for every game build, linked-game change, visual update, or content update.
6. Generate the selected file
Select Generate EXE or Generate ZIP, depending on the format you want. Launcher Forge opens a confirmation window. For the Windows installer, select Generate file.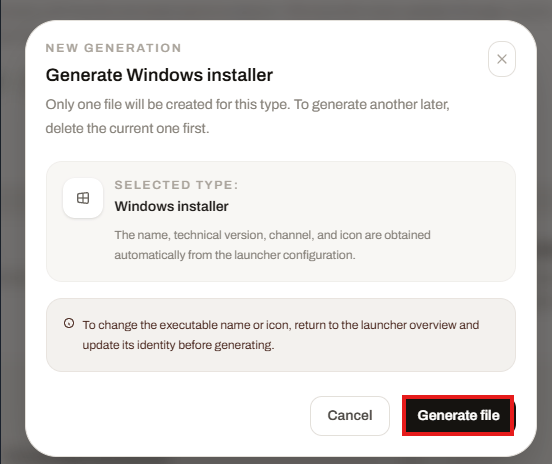
Confirm the Windows installer generation
- Launcher name.
- Technical version.
- Channel.
- Installer icon, when supported.
- Current launcher identity.
The generated installer keeps the launcher name and installer icon that were available when the file was created.
7. Download the generated launcher
Wait until the generation status changes to Ready. The generated file panel displays:- File name.
- File size.
- Last generation date.
- SHA-256 hash.
- Download action.
- Build logs.
- Delete action.
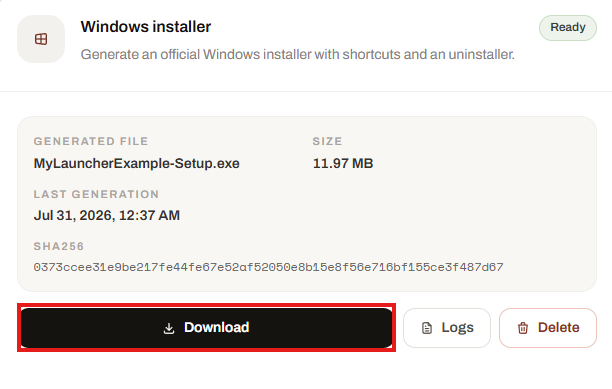
Download the generated Windows installer
- Send the installer directly to testers.
- Upload it to your official website.
- Publish it on your download page.
- Store it in your release distribution system.
Changing the runtime launcher icon does not require regenerating the installer for existing launcher installations to receive the launcher icon update. Only the icon embedded in the installer file remains unchanged.
8. Install and open the launcher
Run the downloaded setup file and complete the normal Windows installation. After installation, open the launcher. The launcher requires an end-user account. Developer dashboard accounts and end-user launcher accounts are separate. The player must:- Register an end-user account or sign in.
- Complete email verification when required.
- Access the launcher library.
End-user authentication protects access to the launcher library and enables player-specific ownership, downloads, keys, and launch-token validation.
9. Acquire or redeem the game
The player experience depends on the access mode selected when linking the game.Free game
When Key was disabled, the launcher displays an Acquire action. The player selects Acquire to add the free game to their account.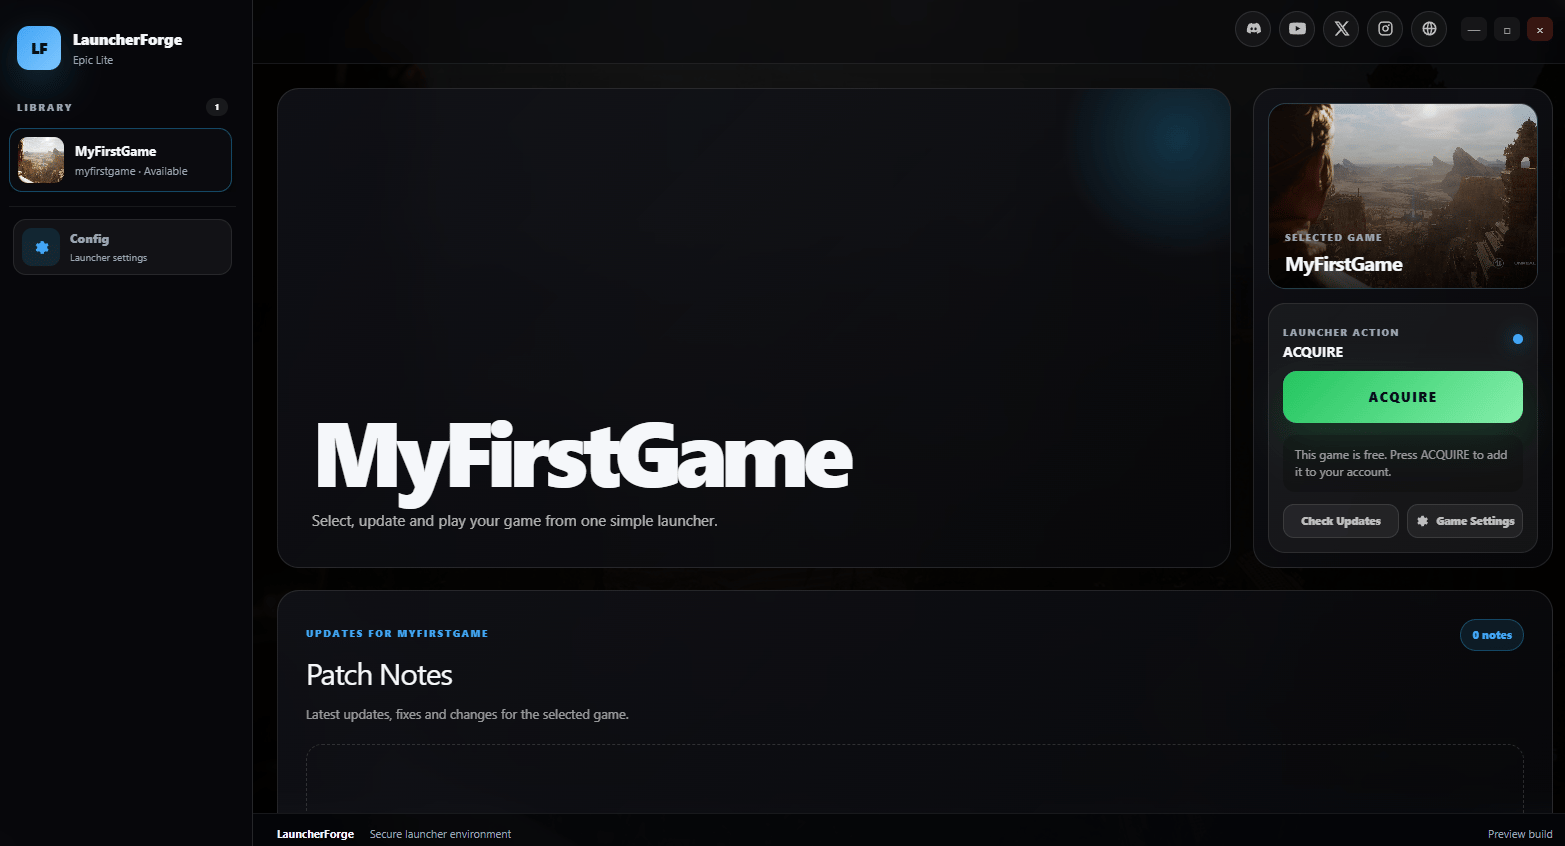
Acquire a free game from the launcher
Key-protected game
When Key was enabled:- The player signs in.
- The launcher requests a valid CD key.
- The player enters and redeems the key.
- Launcher Forge validates the key.
- The game is added to the account.
- The player can install it.
10. Download and install the game
After acquiring or redeeming the game, start the download. The launcher displays:- Current download state.
- Installation percentage.
- Downloaded size.
- Transfer speed.
- Estimated remaining time.
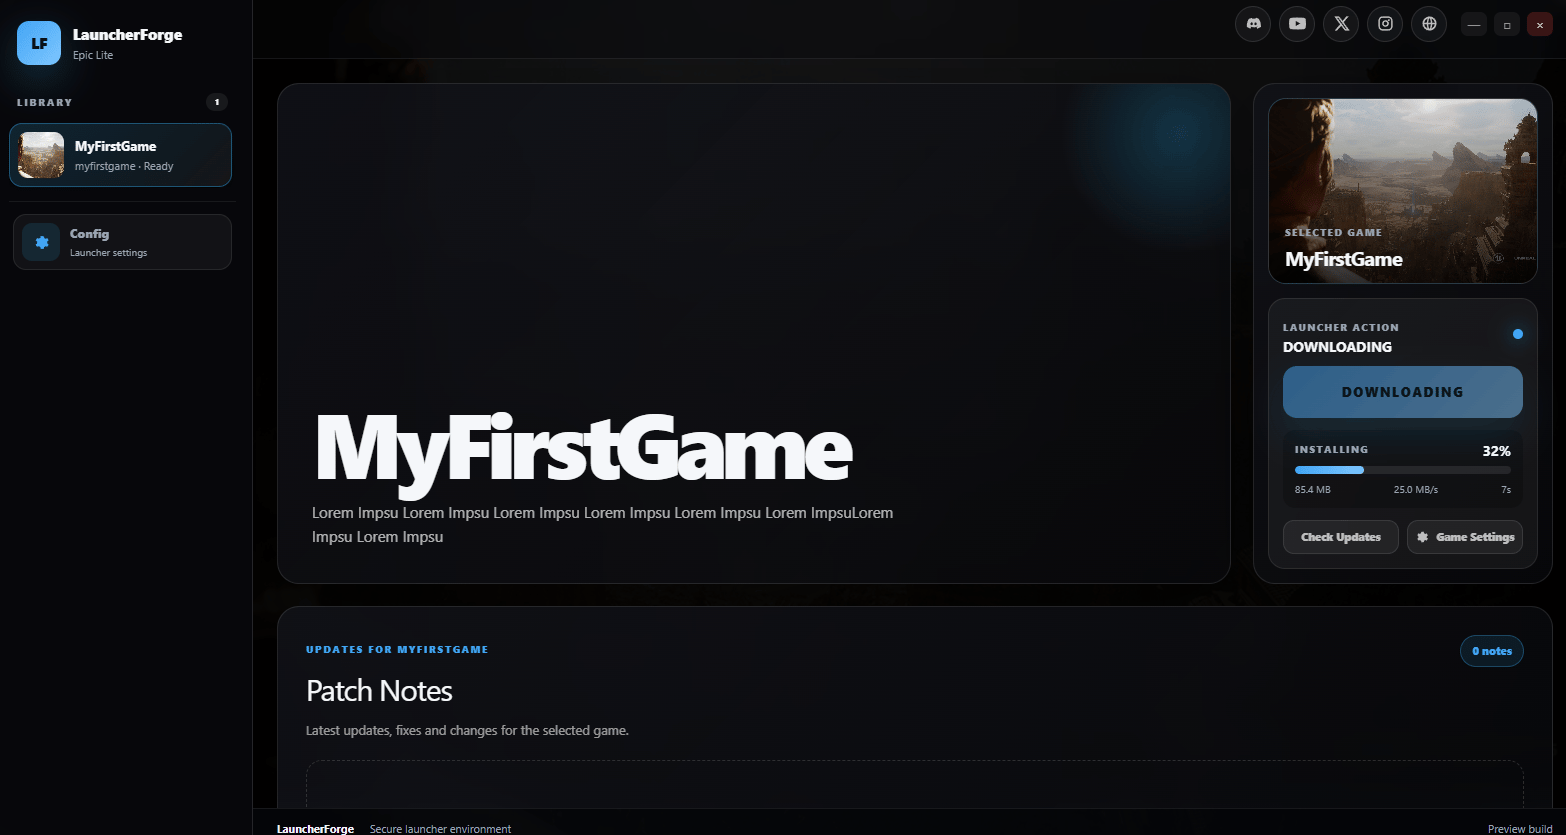
Verify the game download and installation progress
11. Verify the complete player flow
Test the following:- End-user registration.
- End-user login.
- Email verification, when required.
- Game appears in the launcher.
- Free game can be acquired.
- Key-protected game requests a CD key.
- Valid key can be redeemed.
- Invalid, expired, or revoked key is rejected.
- Game downloads successfully.
- Game installs successfully.
- Game starts using the correct executable.
- Launcher detects a newly published version.
- Game updates successfully.
- Runtime launcher icon changes are received correctly.
- Errors provide understandable recovery information.
Your launcher is ready for distribution after the complete player flow works correctly.
Validate the game connection
Installing and starting the game confirms the distribution flow. To integrate and validate the authenticated connection between the launcher and the game runtime, continue with: Launch tokens That section explains:- How the launcher requests a launch token.
- How the token is passed to the game.
- How the game validates the player session.
- Which authenticated player data is available.
- How Unreal Engine and Unity integrations use the validation result.
Managing the generated setup
Return to Generate executable whenever you need to:- Download the current installer again.
- Review generation logs.
- Delete the current EXE.
- Delete the current ZIP.
- Generate a replacement after changing the launcher name.
- Generate a replacement installer with a different embedded icon.
- The launcher.
- Linked games.
- Game builds.
- Published versions.
- End-user accounts.
- CD keys.
- Player ownership records.